Lootbound Aura Planner Tool
Rehearse offense, defense, and utility neighborhoods before you break a live board.
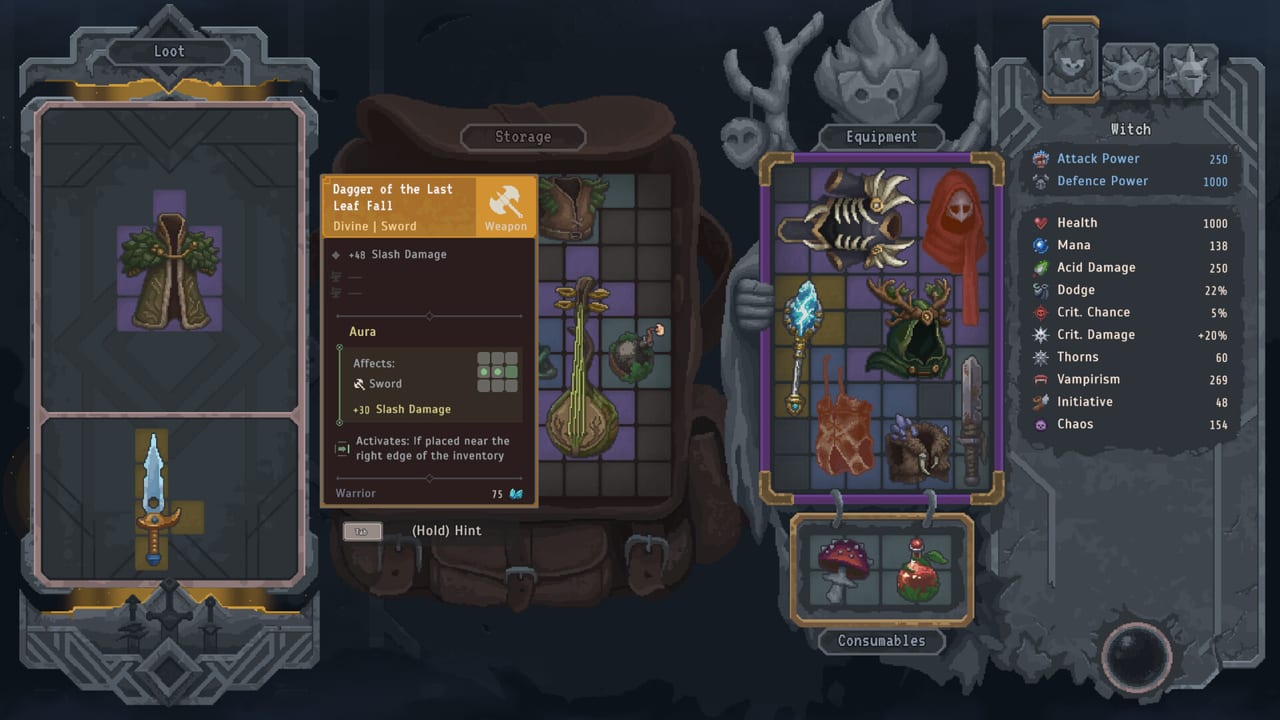
How to use this planner
Work top to bottom. Mark what your offense district must protect, what your defense district must protect, and which utility pieces are allowed to exist without fracturing the center. Then copy that plan onto the real grids.
Toggle the priorities you refuse to break, then follow the rebuild order on your real grids.
Offense district
Defense district
Utility corner
Why zoning rehearsal matters
Live rebuilds happen after stressful elites when your brain wants to click anything shiny. A prewritten neighborhood plan reduces panic clicks. Deepen theory with Aura Districts and Auras Explained.
Pairing with lanes
Crit plans protect payoff clusters (Crit Build. Lifesteal plans keep vamp adjacent to hitters (Lifesteal Build. Tank plans keep bulk together without burying break tools (Tank Build.
Pairing with packing
After you know the neighborhoods, solve footprints via Grid and Rotation and Inventory Mastery.
Common planner mistakes
- Marking twelve priorities (mark three)
- Letting utility sit in the center
- Ignoring companion boards
- Planning a district you do not have keystones for yet
Field notes from failed expeditions
Most players do not fail because they lack mechanical talent. They fail because they change plans every room. Write a one-line plan at the start of a biome—“crit district on hero, break tools on companion, safe route until keystone drops”—and obey it unless the loot pool makes obedience impossible. When obedience becomes impossible, pivot with a full rebuild, not with five disconnected upgrades.
How this page connects to the rest of the wiki
Return to How to Play if the overall loop still feels fuzzy. Use Beginner Tips as a habit checklist after messy runs. Open Tools when you need an interactive rehearsal instead of another paragraph. Confirm store timing on Demo and Release during launch week so patch notes and wishlist messaging stay aligned with reality.
Pre-release and post-release use
Before August 14, 2026, treat every section as demo-validated systems literacy. After release, treat the same sections as a troubleshooting index: inventory pages for board failures, map pages for pacing failures, boss pages for finale failures, and build pages for identity failures. The wiki is unofficial and should lose to the Steam page whenever dates or features conflict.
Extended practical checklist — Aura Planner
For “Aura Planner”, use this checklist at every biome gate and after every elite that nearly wiped you. First, name the lane in one sentence so you cannot hide behind vague ambition. Second, point at the keystone aura on each board and confirm it still activates after the latest pickup. Third, name the armor answer in the party—break, shred, bypass, or a documented mix—and identify which character seats it. Fourth, count remaining mana and health debt before you accept another high-risk branch. Fifth, decide which companion is carrying enable, which is carrying payoff, and which is carrying durability so loot stops being sprinkled by panic.
When a drop arrives, force a four-question filter before it touches the grid: what footprint remains after rotation, which district wants it, which item loses its seat, and whether the swap still serves the finale you are assembling. If you cannot answer those questions quickly, leave the item on the floor. Lootbound rewards decisive refusal more often than heroic packing. Rehearse refusals in the demo until they feel boring; boring discipline is how expeditions become repeatable.
Common failure stories and repairs
On “Aura Planner” pages, failure story A is the museum board: every rarity represented, no district alive. Repair by deleting tourist items until two neighborhoods are obvious. Failure story B is the empty-pool fighter: flashy ability use on trash, silence on bosses. Repair by assigning autoattacks to easy rooms and saving spend for elites. Failure story C is the authored hard counter: boss parts chosen for spectacle while damage coverage was incomplete. Repair by treating part choice as matchmaking against your own seats. Failure story D is companion neglect: hero jewelry polished while allies wear junk. Repair by scripting at least one automatic action pattern that matters every fight.
Cross-link your repair to the right hub instead of rereading everything. Inventory confusion belongs with grid and aura pages. Pacing confusion belongs with route and dice pages. Finale confusion belongs with Guardian pages. Identity confusion belongs with builds and the advisor tool. The fastest improvement loop is narrow: one failure story, one hub, one tool rehearsal, one more run.
Launch-week and long-term maintenance
When revisiting “Aura Planner” in the days around August 14, 2026, expect patches, balance notes, and community shorthand to move faster than any static guide. Use this wiki as a systems framework, then verify contested numbers and date-sensitive claims on Steam. Keep your personal notes short: lane, keystone, coverage, next purchase. Those four fields survive meta shifts better than a screenshot folder of random inventories. After each meaningful clear or wipe, update only the field that actually broke. That is how a fan wiki stays useful without pretending to be a patch blog.
Focus keyword for this page: Aura Planner. Keep repairs tied to this topic instead of rereading the entire wiki after every wipe.
Frequently Asked Questions
Quick answers to the most common questions.
Is the planner a full inventory simulator?
It is a zoning and checklist rehearsal tool, not a pixel-perfect grid editor.
Should I use it every biome?
Use it at biome gates and after major loot spikes.
Does it work on mobile?
Yes. Controls are touch-friendly.
What should I read after planning?
Grid and Rotation, then execute on your real boards.